Add a Pupil
Step-by-step guide to adding a new pupil and preparing them for lesson scheduling and payment.
——— ••• ———
Step 1: Open the pupils page
From the left-hand menu, click Pupils.
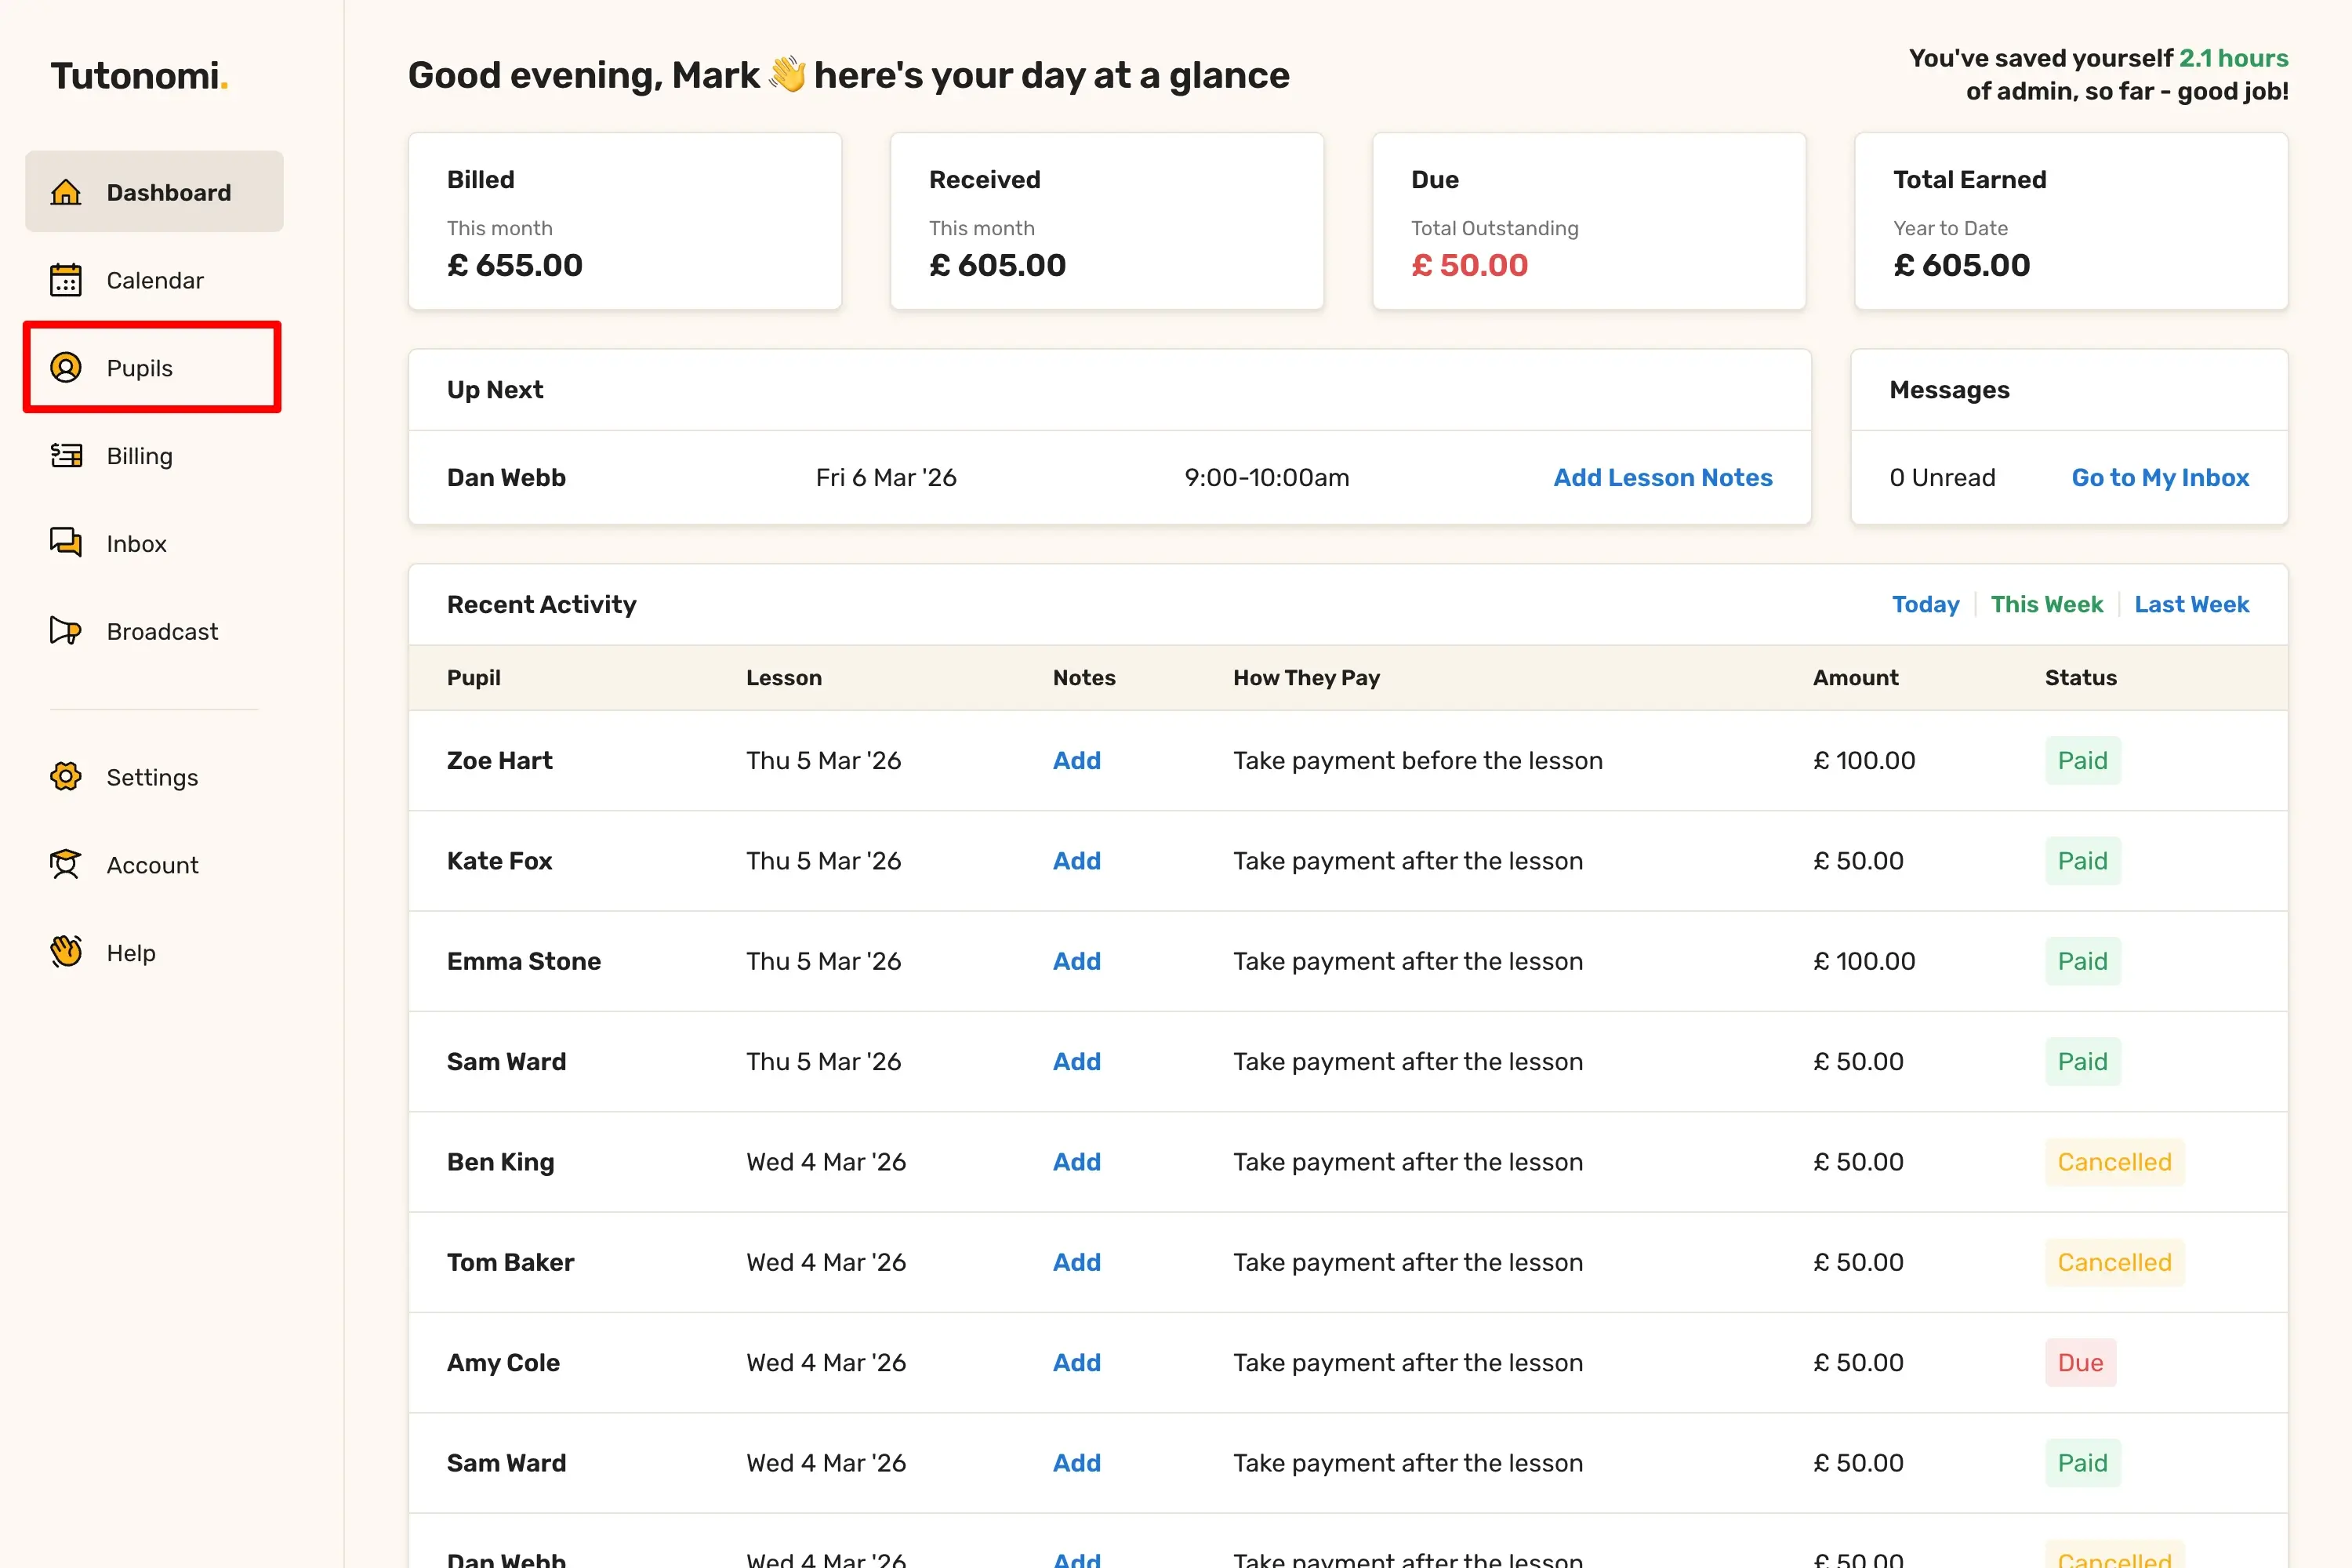
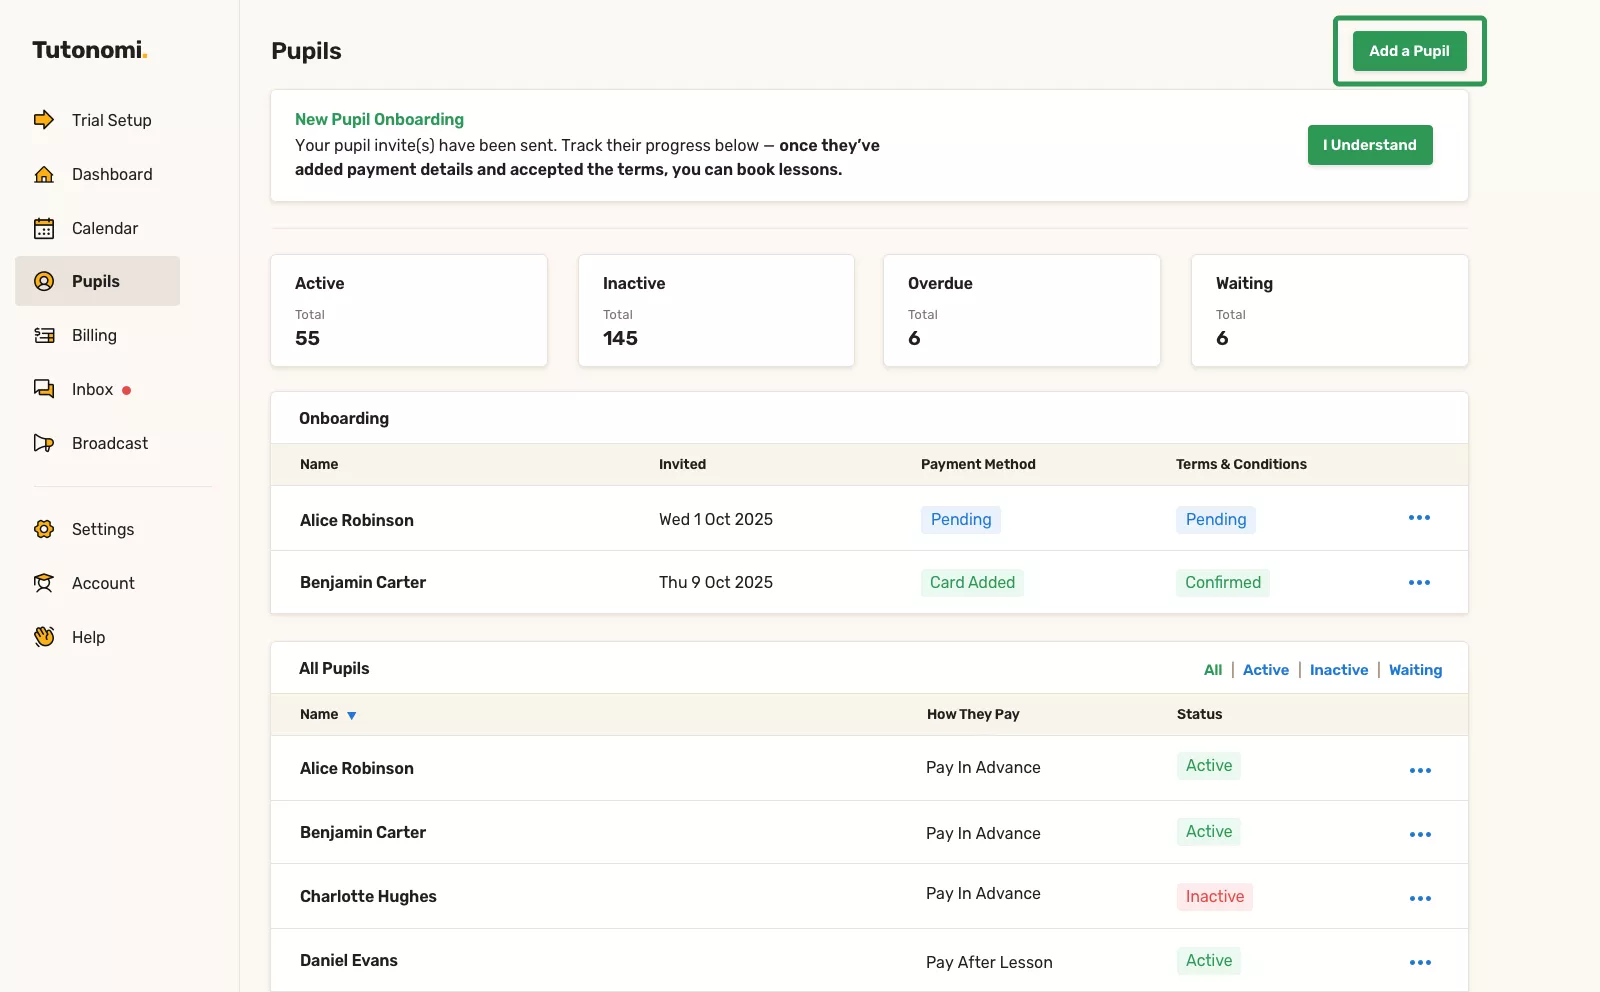
In the top-right corner, click Add a pupil.
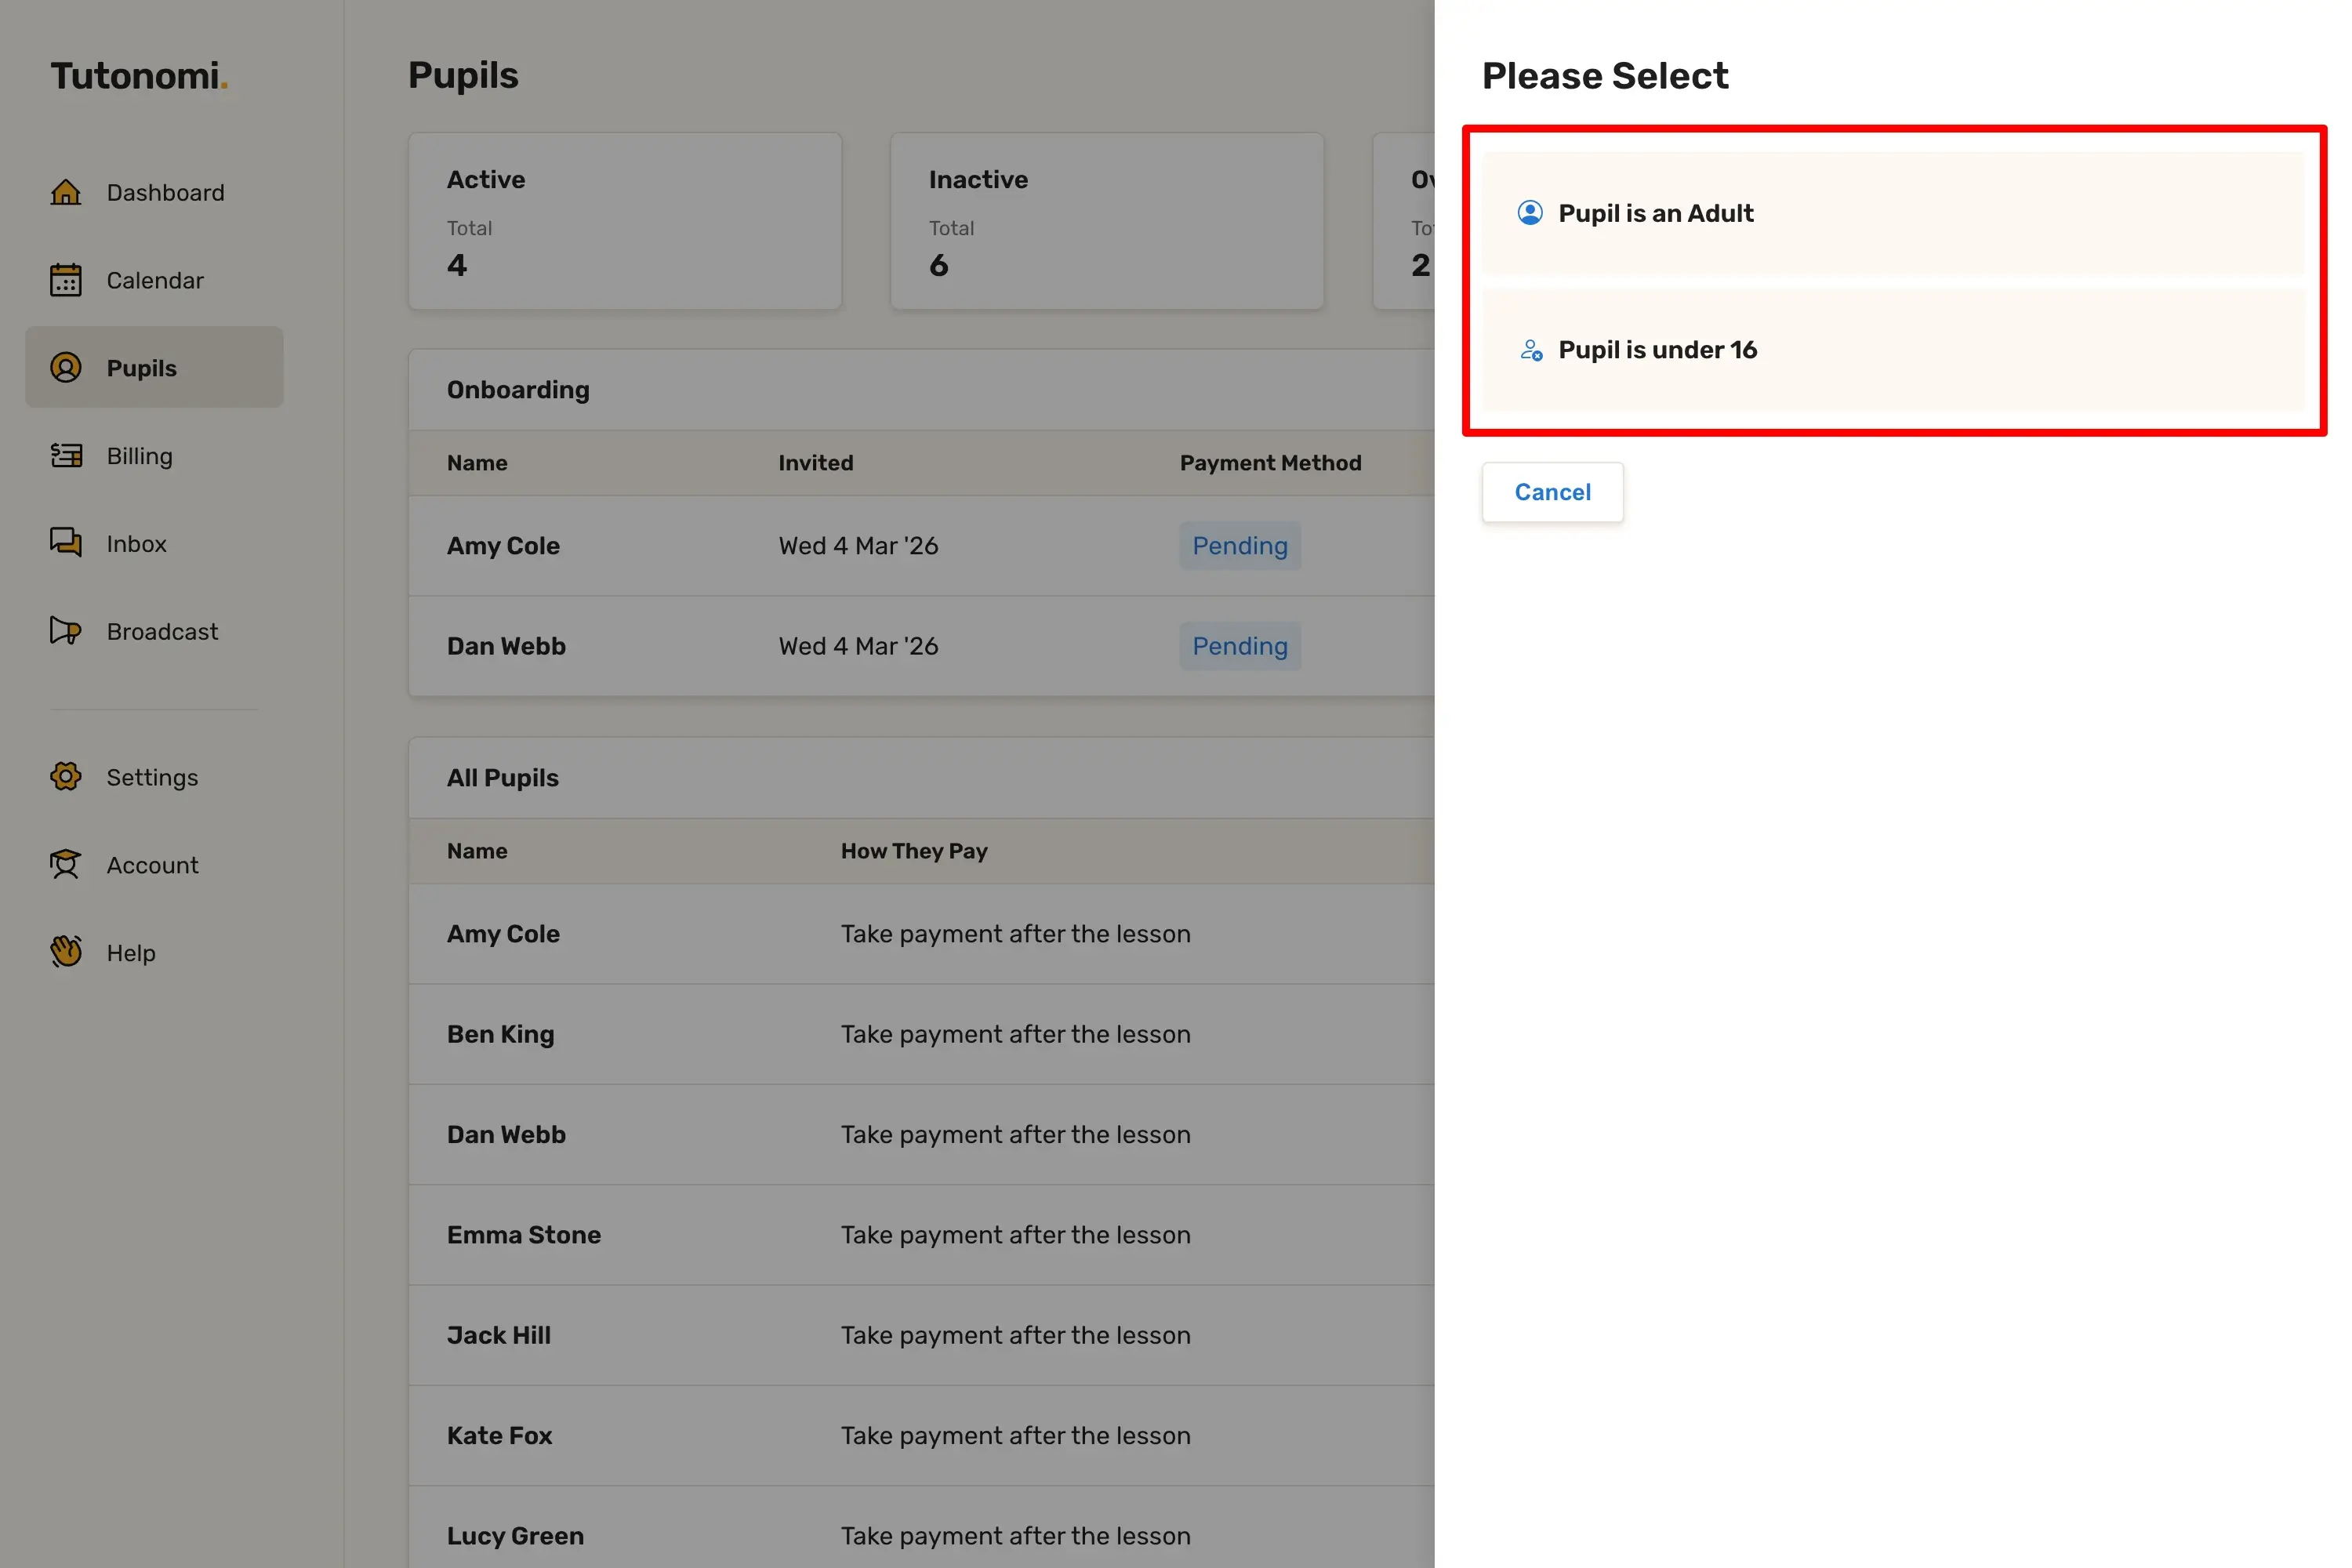
Step 2: Choose the pupil type
Select whether the pupil is:
An adult, or
Under 16
This helps Tutonomi collect the right details and stay safeguarding-compliant.
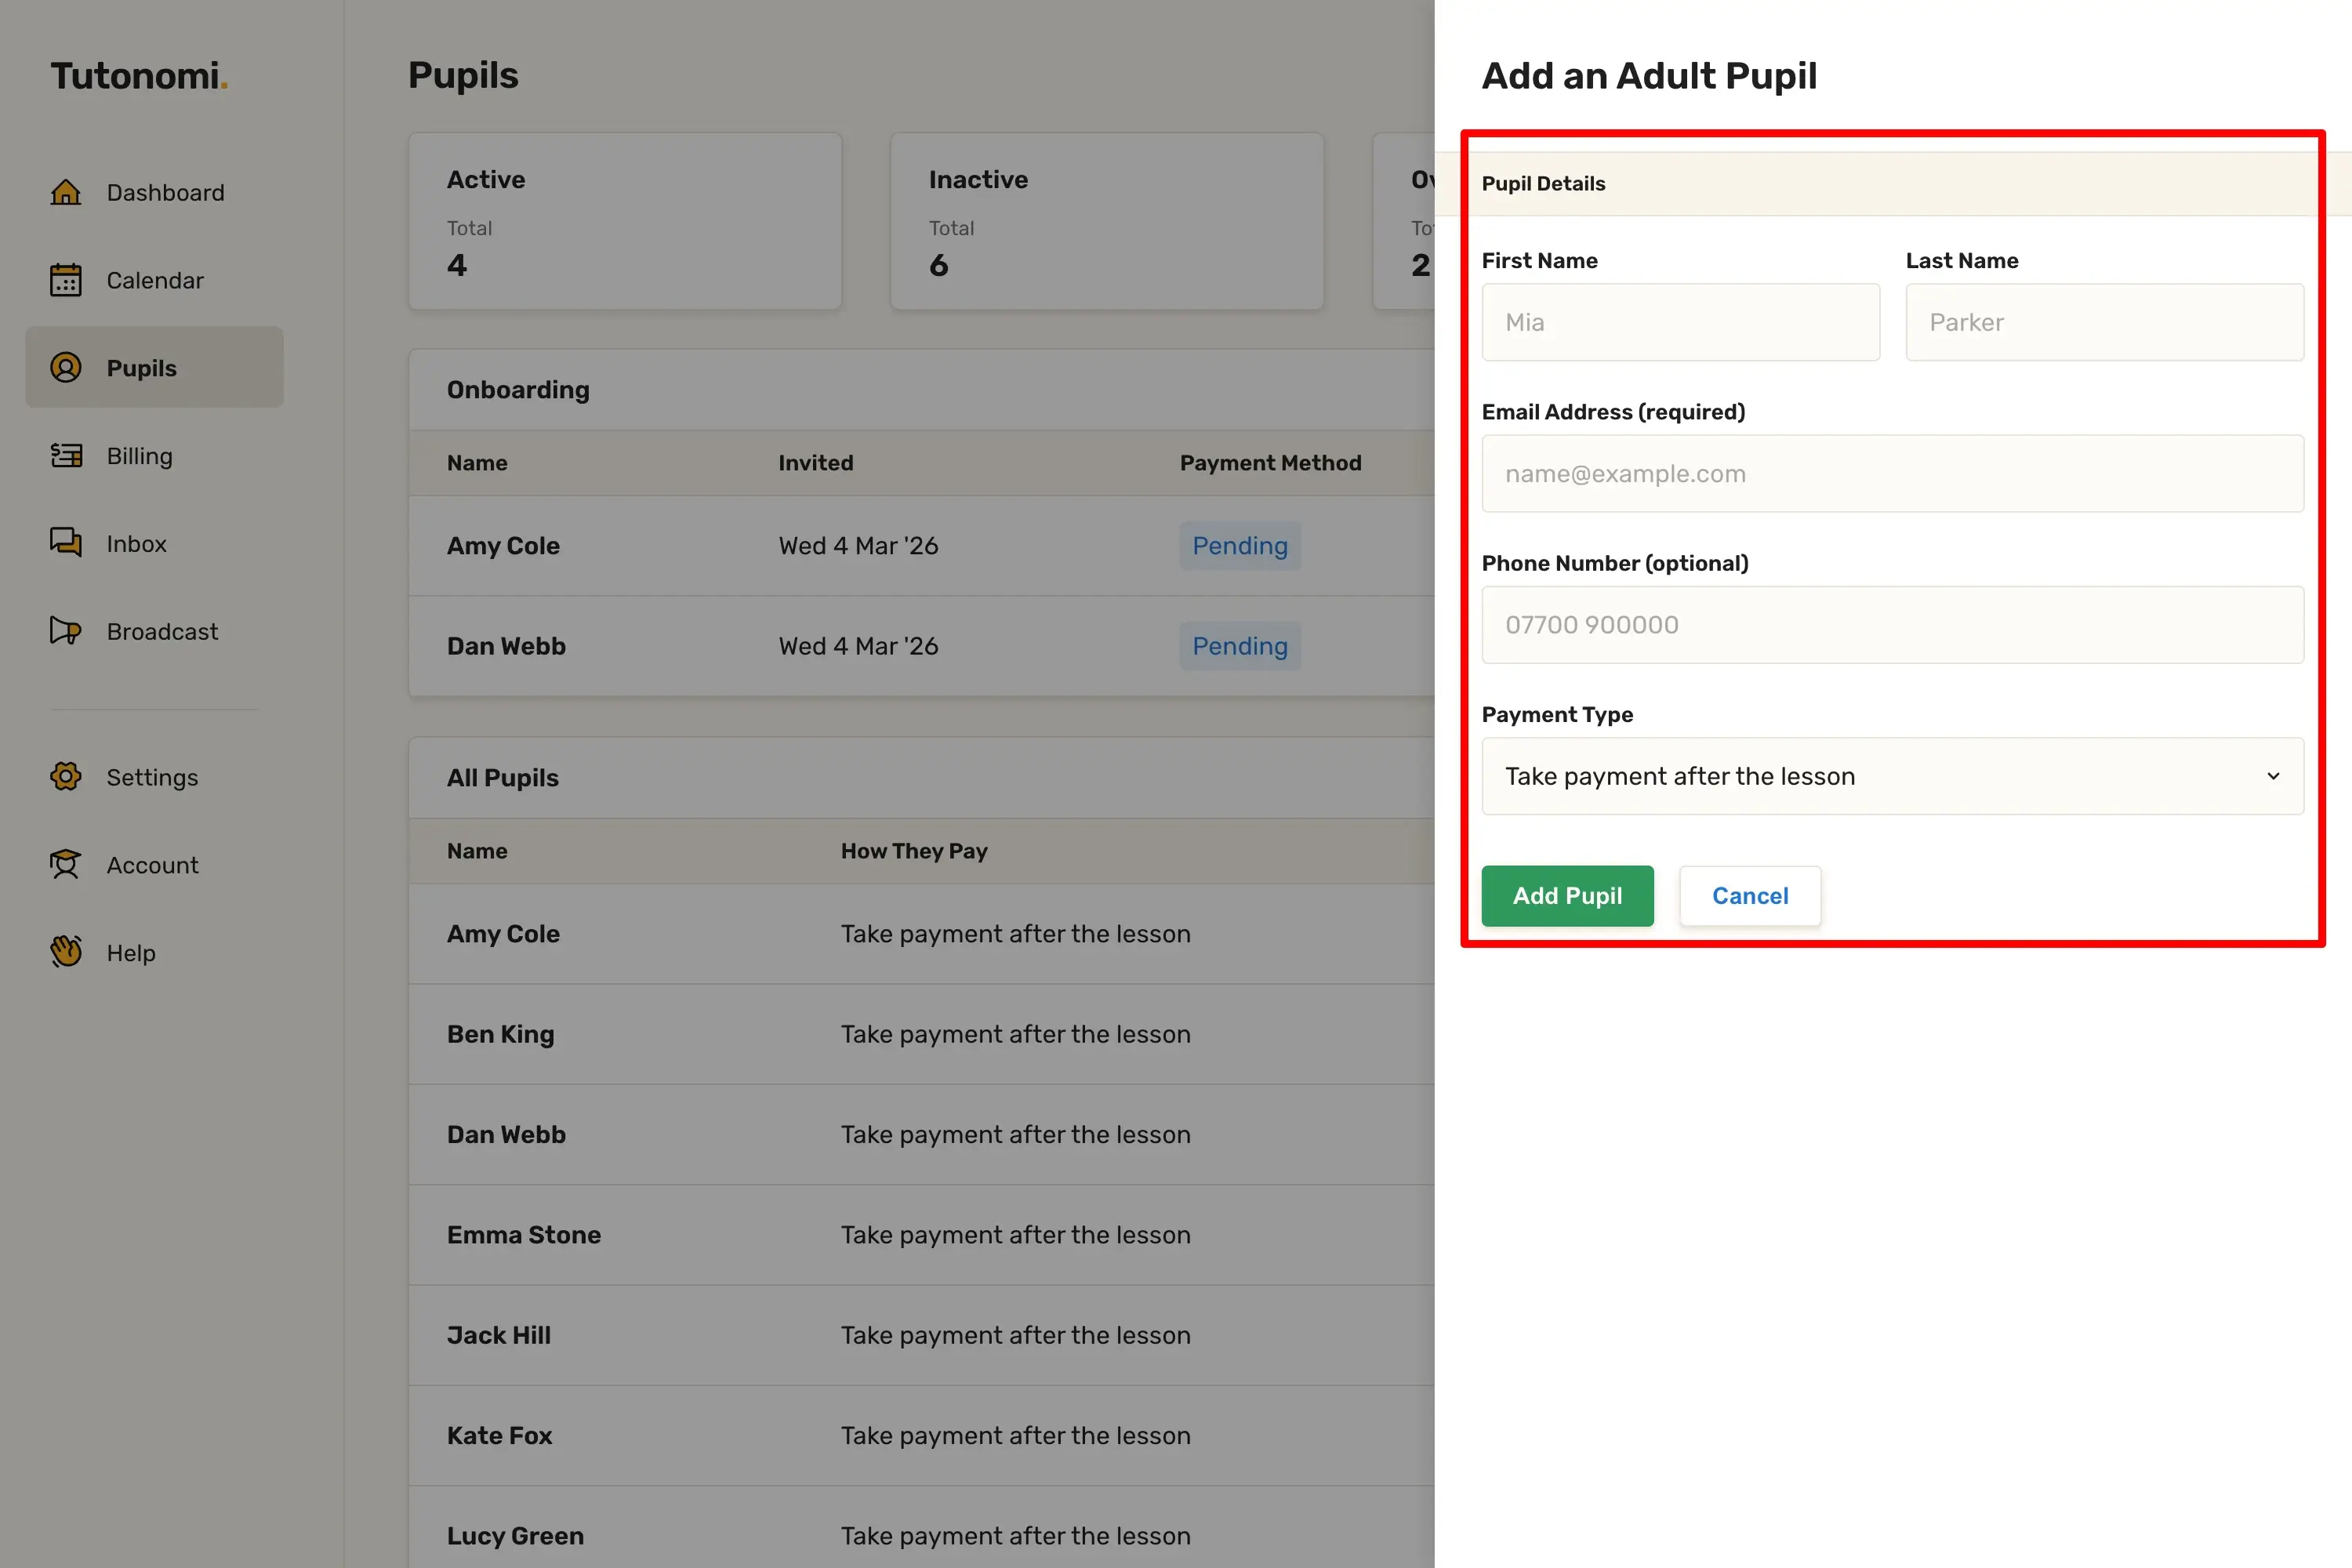
Step 3: Add an adult pupil
If the pupil is an adult:
Enter their name and email address
Add a phone number (optional)
Choose how they will pay for lessons
Tick Primary billing contact if they’ll be paying themselves
Click Add pupil to send the invite.
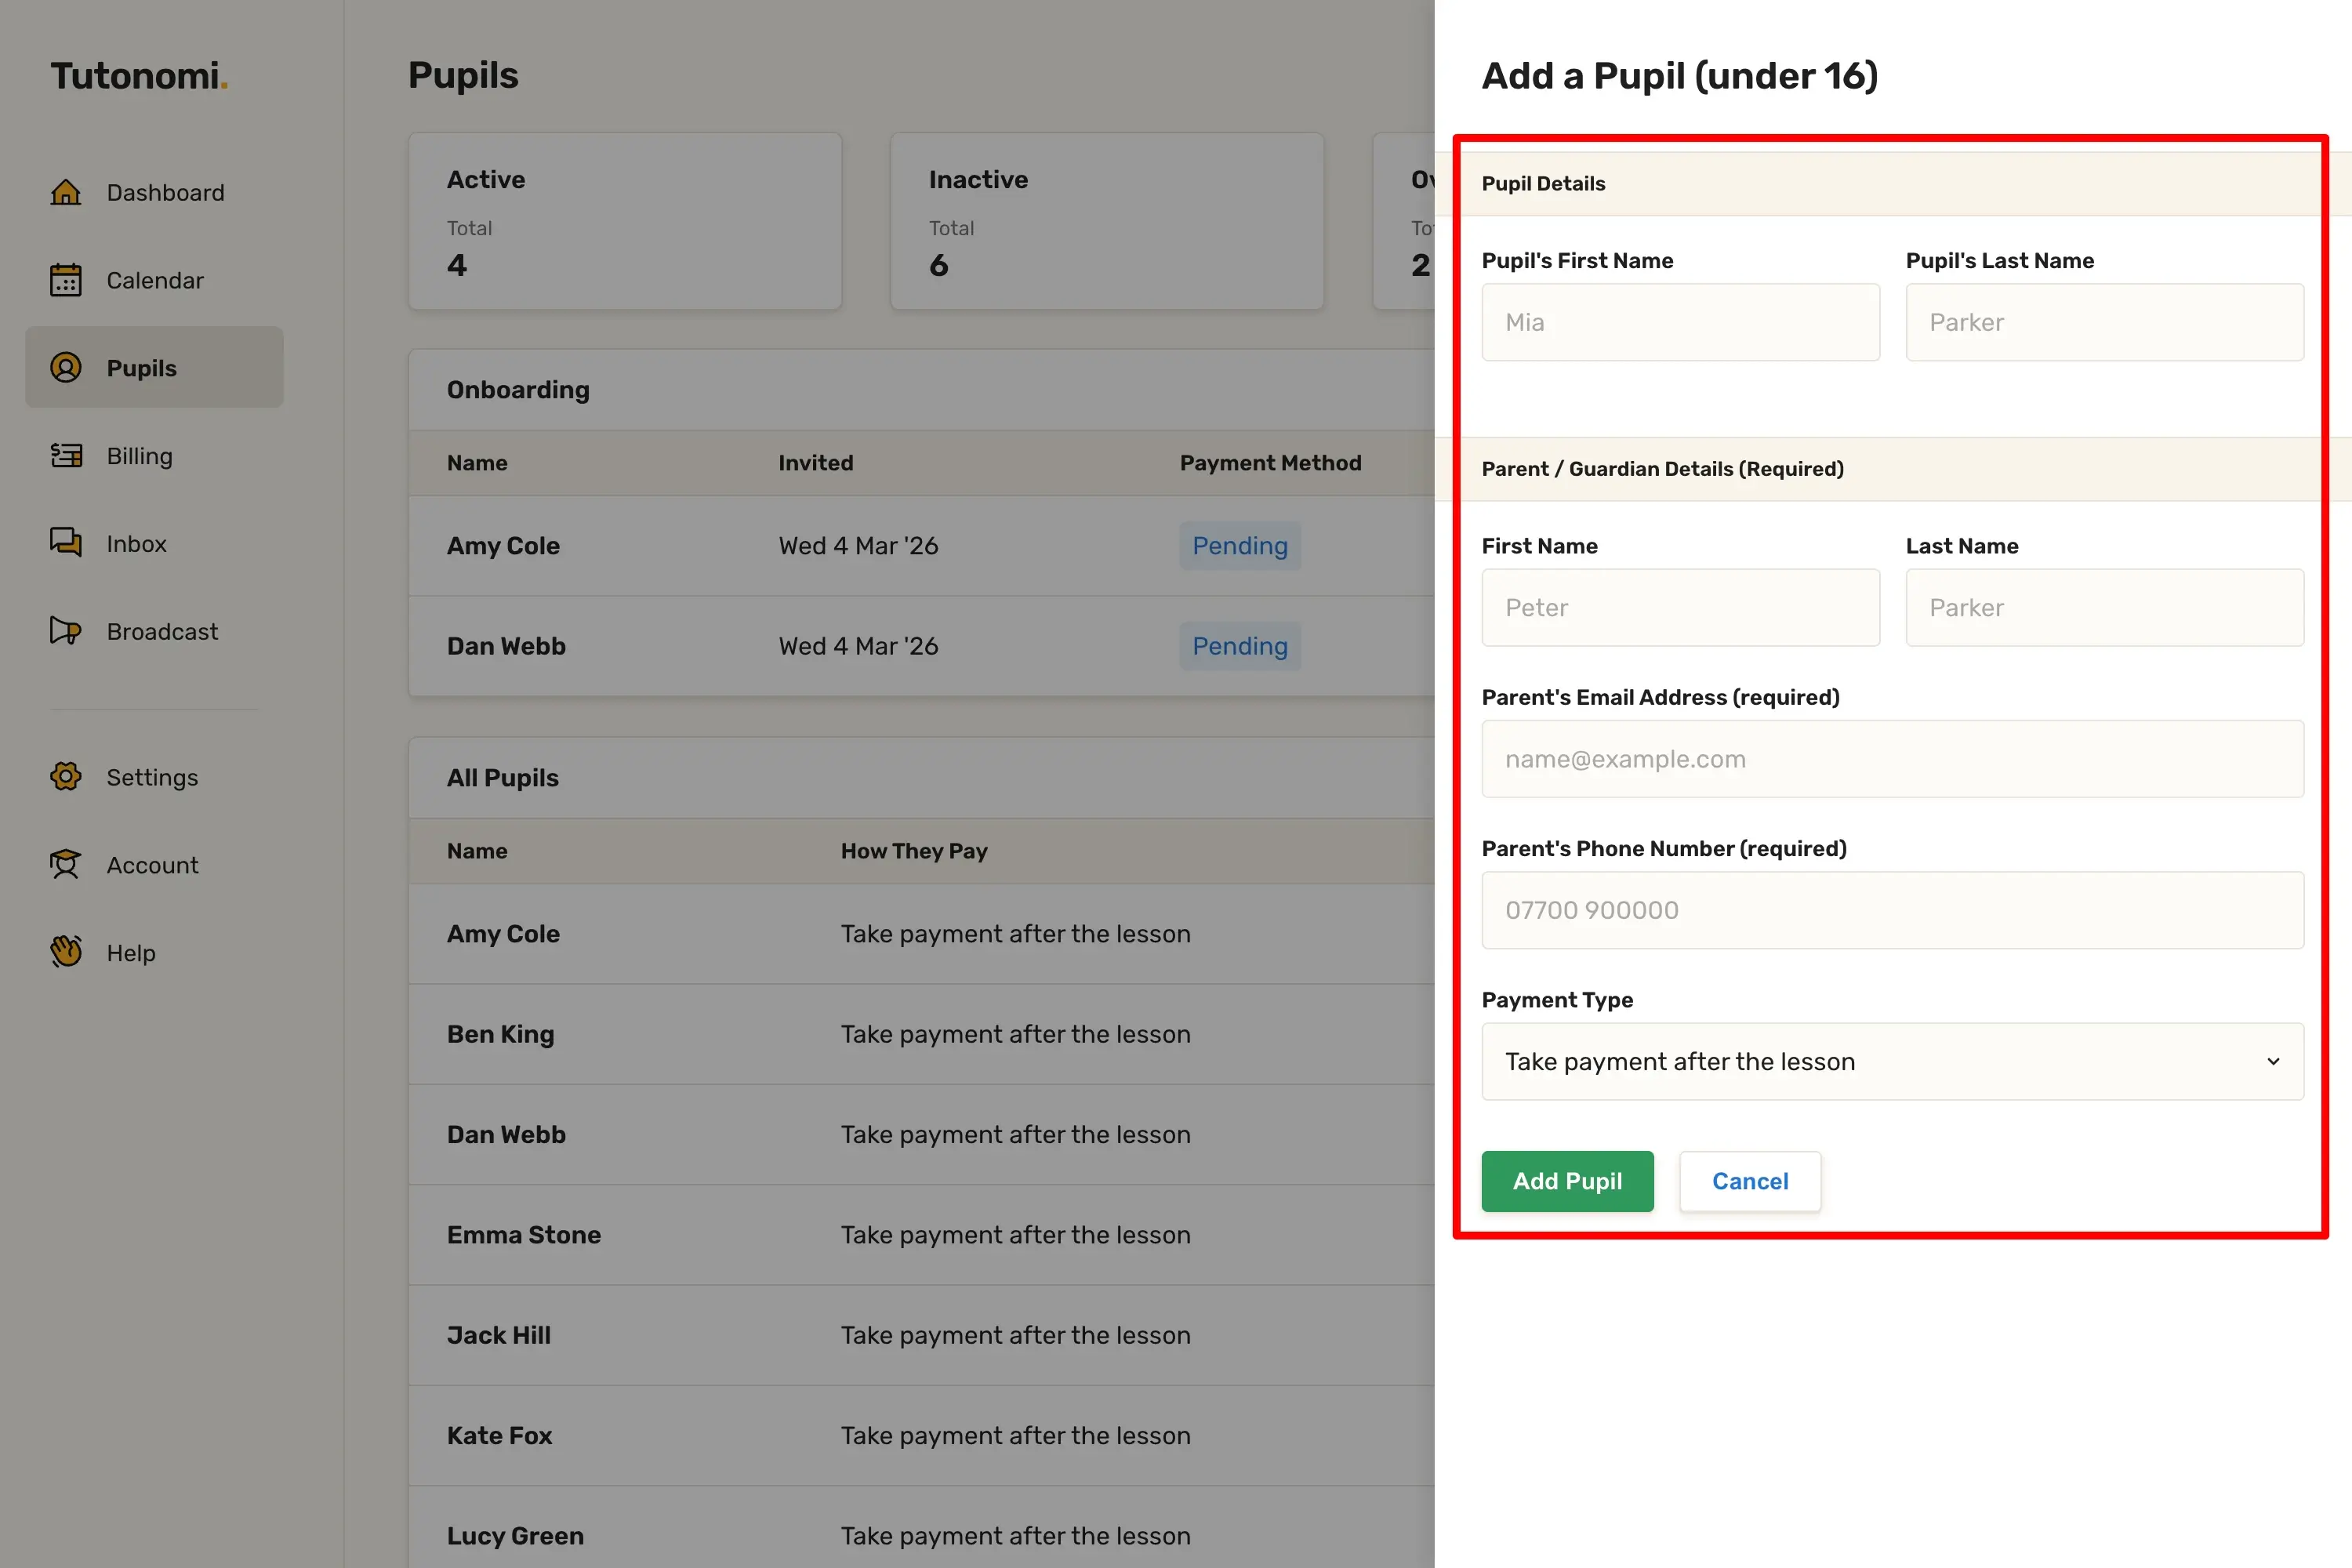
Step 4: Add a pupil under 16
If the pupil is under 16:
Enter the pupil’s name
Add the parent or guardian’s details (required)
Choose how lessons will be paid
Confirm the primary billing contact
Click Add pupil to send the invite.
What happens next
Tutonomi will email the pupil or parent with a secure link to:
Confirm consent
Accept your terms
Add their payment details
Once that’s done, you can start booking lessons.
Need a hand? 👋
If this hasn’t fully answered your question, we’re always here to help!
Send us a message and we’ll get back to you quickly — usually within an hour (9am-6pm UTC).
I simply love it
Saves me 5 hours a week
It's free!
I have more family time now
My schedule is crystal clear
I spend more time earning (or relaxing!)
Now I get paid on time, every time
I highly recommend this app!